Friday, November 21, 2014

ezpz diy: incense holder

We love to light incense in my house. Incense is more than an air freshener; it brings an entire aura to the home. Whether it be cleaning, cooking, reading, writing, meditating or just hanging out, burning incense helps me to set my intention and focus on the task at hand.

incense in naked jars

We were using empty jars to store our incense. I decided these naked jars could use some beautifying. Plus tackling this project allowed me to play with use some of the crafting supplies that I've been amassing and practice some crafting techniques that I might be able to use to make gifts for the upcoming holiday season.


For the first jar, I decided to cover it with scrapbook paper. This was simple enough as I'm pretty familiar with the technique from the coaster projects that I've done {here and here}.
First I cleaned the jar. {You can read about that here.}
Next I measured and cut scrapbook paper to fit around the jar. I didn't want to go all the way up to the grooves because I didn't feel like dealing with wrinkles and bubbling as the jar indents. So I kept it simple and measured in order to wrap the flat part in between where the jar curves {I hope that's not too confusing. But the pictures should make sense.}
scrapbook paper covered jar

scrapbook paper covered jar

Next I applied a coat of  Mod Podge to the back of the scrapbook paper and to the jar itself.
mod podge application
You need to move quickly here as you don't want the Mod Podge to start drying and prevent you from getting perfect adhesion. You have about three seconds {don't quote me} to ever so gently readjust your paper if it's slightly off. You want the edges to line up just right. I cut my paper to have about a 1/16th of an inch overlay because I was too nervous about having a gap if it didn't line up right.{The scrapbook paper I used is fairly thin. I wouldn't recommend overlapping thicker paper.}
Be sure to quickly smooth and straighten out any wrinkles or bubbles. And then allow the application to dry for about fifteen minutes.
mod podge application
When I felt it was dry enough, I applied a coat of Mod Podge over the scrapbook paper. I used a bristle brush instead of a foam brush {which most people use to apply Mod Podge} because I actually wanted to enhance the brush strokes. I wanted the brush strokes to give the project texture, plus I figured the vertical lines throughout would be a great camouflage for the seam where the paper meets itself.
mod podge application
Mod Podge goes on white, but dries clear.
clear drying mod podge
I allowed this to dry for a few hours while I took care of some stuff around the house and then applied a coat of Polycrylic to seal the project. You will see different recommendations for the amount of coats of Mod Podge or sealer you should use depending on the project. For this project, I figured one coat of each was sufficient enough for how I planned to use the jar. 
Decoupaged recycled jar incense holder
After the jar set overnight, it was time for the finishing touches. I knew I wanted to use a ribbon as an adornment, but I had to be careful not to make it clash with the existing decor and I also had to consider my husband's taste. I tried to go for some more muted colors, but they just didn't do it for me. I loved a hot pink against the black and white, but I knew that was pushing it. So I opted for a bright green that gave me the same vibrance of the pink and I can reason into decor and green is my husband's favorite color. {And if it turns out terrible not to my liking, I can always gift it.} I simply attached the ribbon using my hot glue gun.
Decoupaged recycled jar incense holder

And here's the finished product.
Decoupaged recycled jar incense holder
Easy peasy.


I am currently working on finishing up the other incense holders. Check back soon to see how they turn out!

Wednesday, November 19, 2014

ezpz diy: how to remove labels and sticky residue from salvaged jars


Remember back when I was searching for projects using jars... well here's one that I got around to doing. My jar collection was getting ridiculous and I knew it was time to either do something with them or put them out for recycling. With the holidays coming up, I figured homemade gifts can be a good way to get rid of use some jars. I wanted to try out a few different beautifying techniques before tackling the gift jars. So I decided to practice on the jars I was using as incense holders.

The first thing I had to do was remove all of the labels and sticky residue from the jars. For this, I decided to put a popular Pinterest method to the test. There are thousands of pins out there touting the efficiency of baking soda and olive oil as a simple fix for the begrudged sticky residue. Does it work? Here's my experience:
clean labels from jars using baking soda and olive oil

First I submerged the jars in hot soapy water for about five minutes. {If your jar still has a label intact it might take much longer, but I soak and peel my labels as soon as the jar is empty. However, I don't always get them completely clean.}
Next, I rubbed a mixture of equal parts olive oil and baking soda on each jar. {I used a tablespoon of each. And just scooped some out with my finger tips and rubbed it on the jars.}
I let the jars sit for about ten minutes and then simply rubbed them clean in the soapy water using my hand.
Easy peasy.


There was one jar, that still had remnants of the label on it when I began. For that one, I actually treated it twice. The first treatment lifted the label and the second one lifted the glue. I probably could have used more elbow grease with just one treatment to get the glue off, but doing it twice was way easier.

clean labels from jars using baking soda and olive oil
I will definitely be using this method to remove the labels and glue residue from jars here on out. I guess you can call it a pin win.
clean labels from jars using baking soda and olive oil


My next post will feature a completed jar. Here's a sneak peek: 

box of ribbons

Wednesday, November 12, 2014

creating early readers


I've always loved to read. I think it's due to a mixture of personality and teacher and parent encouragement. In school after finishing an assignment early, our teachers encouraged us to read independently at our desk until it was time to reconvene. I remember enjoying sitting at the back of the class because I was within arm's reach of the classroom library. At home sharing a bedroom with my older sister, my mother clipped a desk lamp onto the headboard of my lower bunk so that I could continue reading well past bedtime without disturbing my sister. Oh and for all of my life my mother has worked as a college librarian. Growing up I would spend "sick days" playing amongst the seemingly endless shelves of the college library. Not to mention at home we had a six foot tall bookshelf plus a number of milk crates filled with encyclopedias, old textbooks and school readers, library discards, and fiction and non-fiction books to suit all ages. There was no shortage of books in my young world, and I made fast friends of them all.

Given my love for books, it is important to me that my son develop a love for reading as well. It breaks my heart to hear young kids say, "I don't like reading" or worse an adult who proudly proclaims, "I don't read." {Whhaaaa!} So it is my duty as a parent to instill in Maki a love for reading. I want to share a few steps that I have taken to introduce and encourage early reading.

Read everyday
The American Academy of Pediatrics recommends reading daily to children from birth. Even if it's half a book in between Lego building or five stolen minutes before meal time, make time for books. Reading everyday introduces your child to concepts that may be difficult to teach in the real world {unless you're a super human continent hopper}. Daily reading builds vocabulary and teaches your child how to handle and treat books. Not to mention, early reading sets your child up for success in school and later in life.

Build a home library
Invest in books. Building a library can seem like a costly venture but it doesn't have to be. There are many free and low cost ways to acquire books for your child's library. Request that family members buy your child books as gifts instead of toys. Shop yard and rummage sales, second hand book stores, thrift stores, and check with your local library for their  policy or program on discards {perfectly readable books that have been removed from the library's collection}.

bi lingual spanish english
 Our local library offers discards for sale in the cafe. All children's books are priced at $.25 plus your child gets a free book every visit! What a great opportunity to grow your child's library. They even have an awesome ethnic section {filled with books with little brown faces!}. I love that Maki can read stories of characters who look like him. Plus we've even scored a few bilingual story books which help make my goal of teaching Maki Spanish more realistic.


reading nook
Creating a reading nook can be as simple as a floor mat and a few pillows!

 Be sure that your little one's library is accessible to them. Store the books within reach. You want your child to have access to the books at any time. We started with a small space on the bottom shelf of our bookcase {where space is already at a premium}. Once Maki's collection outgrew the allotment we moved his books to a low cubby underneath the printer {which is also quickly nearing capacity}. No matter your storage solution, keep it low and accessible for your child.
If you're concerned about damage, I suggest starting with board books and slowly graduate to paper books {keep a lot of tape on hand for the book infirmary}. Of course keep any books that you couldn't stomach getting ruined higher out of reach {but don't forget to include them in story time}
 
Visit the public library
Your library may not have a discard program, but it's still a great place to visit. The obvious reason here is a plethora of books from which to choose.  You can try out different genres/interests with your child before spending hard earned money on something they'd hate. Plus many libraries offer reading programs for young children with incentives to make the reading fun even more fun! Check out your local library to see what they have to offer. You might be surprised.

Be a model reader
Naturally small children want to emulate parents. So model the behavior you want them to adopt. If they see you read, they're more likely to want to read themselves. Even if you don't consider yourself much of a reader, consider becoming a reader for your child's sake. Find a book that interests you, and commit to a page a day, or five to ten minutes a day. You might soon discover that you enjoy reading for pleasure.

Read more about the benefits of early reading.

Do you have any tips to help create early readers? 
What does story time look like in your home?

Thursday, October 30, 2014

ello guvnah... {and president}


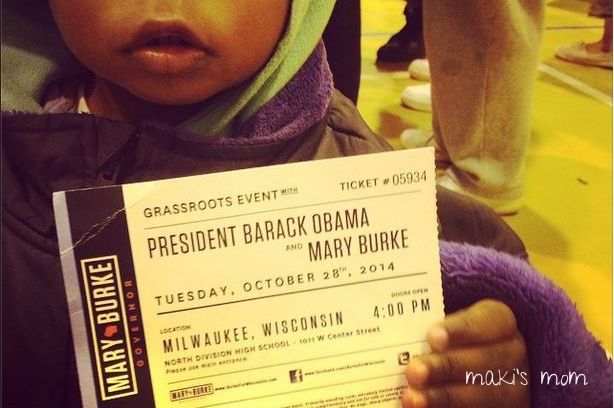
This past Tuesday Maki and I had the awesome opportunity to hear President Obama speak! The President visited Milwaukee to campaign for gubernatorial hopeful, Mary Burke. {Of course she spoke too. But that's only significant if she wins, right?}
I was a little apprehensive about the entire experience from the onset. First off, I hate lines and I hate crowds. I was nervous about how he would take to so much happening around him. Well I shouldn't have been nervous at all. My little guy is a trooper. We waited two and half hours in dropping temperatures and spent another two hours inside the event. Maki behaved better than I ever could have expected.

The weather has been pretty moody in Milwaukee the past few weeks. Fall is trying to hang on while Winter seems to be gaining turf. Tuesday was a warm Autumn day, riding the unseasonably high temps from Monday but as the sun dipped off into the cityscape it took all traces of warmth with it. Luckily for us, I had decided I would wear Maki during the event. I don't babywear much at all anymore. Maki has long outgrown his strappy carriers, and he's pretty much at the weight limit of the Moby wrap. {I've been begging Daddy for a toddler back carrier. The older Maki gets, the harder it is to justify the purchase.} Not to mention, he's so active I couldn't imagine a time when I'd need to wear him besides to an event like this one. But knowing that I'd be attending alone, strollers weren't allowed and there was no limited seating, I figured I'd better bust out the Moby and do my best with it. {Daddy joked that, Makis is so big now, I'd be strapping a man to my chest. Har har har!}
It was the perfect decision. The body heat kept both Maki and me warm as we waited in line. Maki being so close to me, kept him calm and gave him refuge from squealing admirers. And I did not have to deal with trying to chase, arm-carry, or keep up with a toddler. I was even able to breastfeed him in line and at the event without anyone even noticing.
Though, I must say that those hours of toddler wearing definitely took a toll on my body. By the end of the night, my legs were all wobbly and my biceps were super tight. When I laid down to sleep I could already feel my legs stiffening. The next day I woke up feeling like I had done an extreme total body workout--which I guess technically I did. Even my abs were sore.

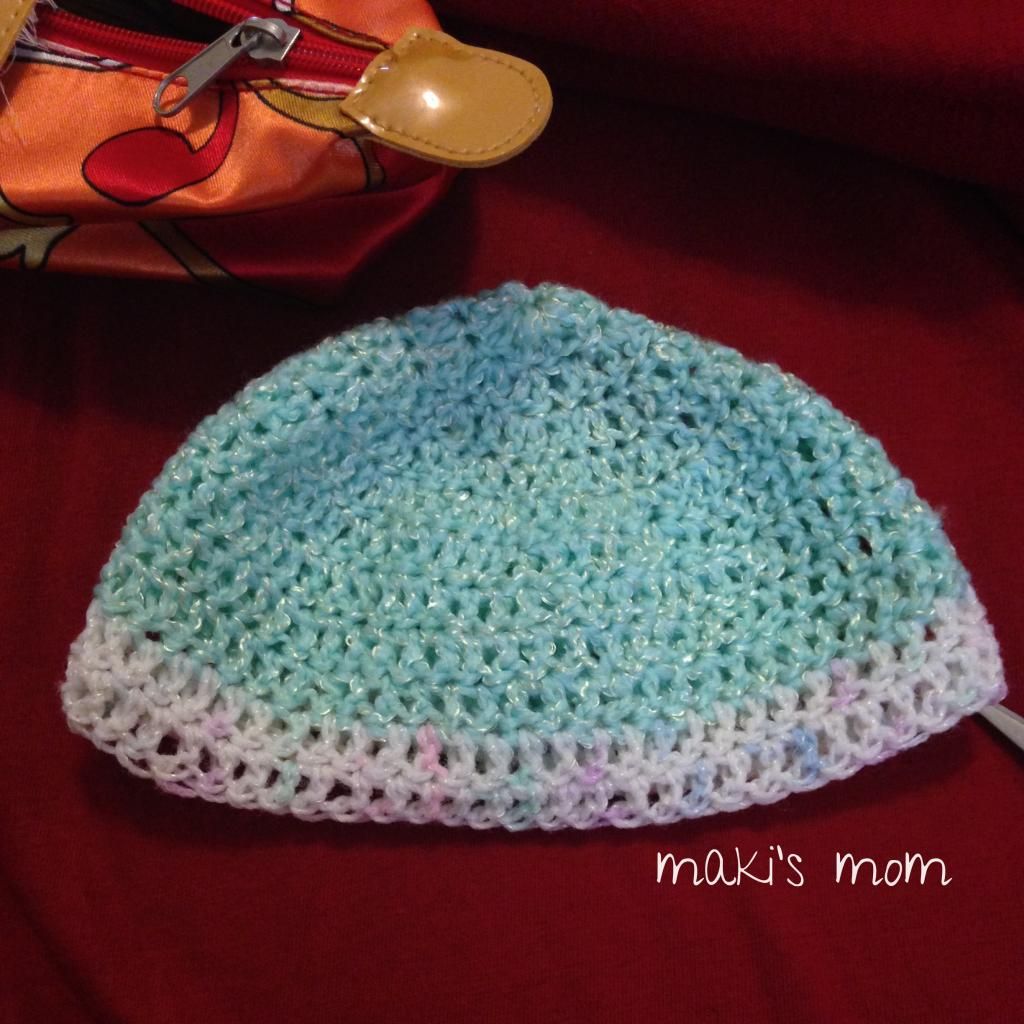
Long lines, cold weather, achy body aside--I'm really glad I took Maki to see the President speak. I'm not really one to get star struck. And when faced with the aforementioned conditions, if making a decision for myself, I'd rather stay at home in my warm bed crocheting and watching Damages {my current Netflix binge}. I can catch the sound bites on the ten o' clock news. But this was another time where I felt that this opportunity wasn't for me. It was for my son. I took pictures, captured videos and have the ticket stub as a memento so that when Maki is older, he can look back on these things and know that he saw the President of the United States in person {whether he remembers it or not}. Not many people can say that.

Did you know:
You can request a greeting card signed by the sitting President to celebrate your baby's birth.

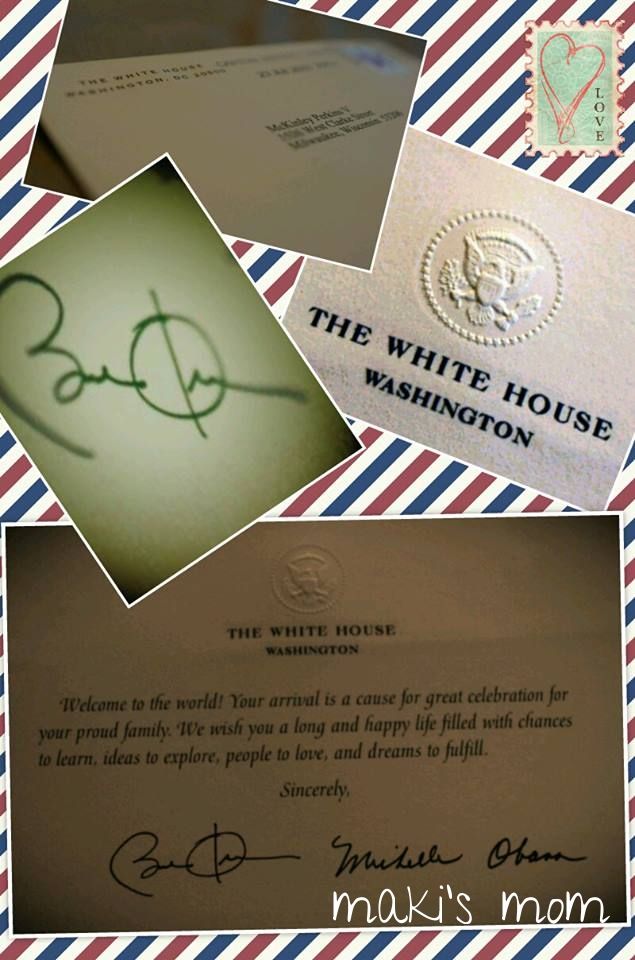
Maki's Presidential greeting from The Obamas.
Click here for more information.

P.S.- Tuesday was also Maki's half birthday! Happy 18 months, Maki!

Monday, October 6, 2014

crochet rocket


I've been teaching myself to crochet. {I have a hard time not reading the word crochet as crotch-it. Oh, the many idiosyncrasies of the English language.} I've wanted to learn how to crochet for a long time. I have always admired women {especially women my own age} who crochet. Looking at a finished piece was intimidating. I believed there was no way I could do something so intricate. Or that it was too late for me to learn to crochet. I seriously thought that. I don't know why I felt that way. I think maybe because I saw my sister learn at such a young age I felt, since I hadn't yet learned I would just never be one who crochets. I know that that doesn't really make much sense, but I think often times the things that prevent us from growing and trying new things never really make sense.

Using YouTube videos and my jack of all trades sister's advice I have learned a few of the basic stitches: single crochet (sc), double crochet (dc), half double crochet (hdc), and treble or triple crochet (tr or trc). I've made a couple scarves and hats as well as a couple bows for a friend's pooch. The bows are incredibly easy and quick to make. They are so cute and can be used as jewelry, hair and wardrobe accessories, crafting projects and I'm sure much more. I'm lightly toying with the idea of making some for sale. But I'm not really ready for that, so maybe further down the line, it's something I might consider more seriously.

Check out a few of my completed projects:
crochet scarf
My very first crochet project.
A newborn hat for my expected niece/nephew.
An blurry action shot of Maki wearing a beanie I crocheted.

My first attempt at crochet bows.

Lessons learned the hard way:

Buy enough yarn to complete your project all at the same time.

I picked up some yarn to make a hat and scarf set for my nephew. Being new to crocheting, I wasn't really sure how much yarn I should get, so I started with one roll. {I could always come back and get more, right?} Wrong! Half way through the scarf, I ran out of yarn, so I returned to the store for more yarn. I bought two rolls: one to complete the scarf, and the other for the hat. When I got home I realized that while on the label, they were the same color, the two rolls I had purchased must have come from different lots as the dye varied slightly, albeit noticeably. One of the newly purchased rolls was a perfect match to the half completed scarf, so I used that one to complete the other half. The off color yarn, I used for the hat. 
{Problem solved, right?} Wrong! 

Half way through the hat, guess what!? I ran out of yarn. Back to the store I went. This time I was a little concerned if I would be able to find a color similar to the roll I used for the hat, since it was an off color to begin with. So I brought the hat with me, so I could match it up as best as possible. To my dismay, the color was completely sold out! There wasn't an on or off color to be found. So I chose a solid color to best match it. I plan to undo some of the hat and re-crochet introducing the solid color early on so it doesn't look like a last minute "I ran out of yarn" switch. Lesson learned for the next time.


Did you know:
yarn bombing, crochet
Photo Source
  • Before hooks, people used their fingers to crochet? Considering crocheting is basically the knotting of loops, this doesn't seem like it would be too difficult to accomplish. Although, I imagine a career crocheter would have a serious case of carpal tunnel. 
  • There is a worldwide graffiti knitting movement known as yarn bombing. Wikipedia credits Magda Sayeg of Houston, Texas as the founder of the spreading movement in which public spaces, fixtures and items are partially or entirely fitted with a knitted or crocheted cozy. An Instagram search for #yarnbombing yields over forty variations of hashtags, the largest with over twenty thousand posts! 

Monday, September 22, 2014

ezpz diy: coasters {again}

Remember these coasters? I enjoyed making them so much, I decided to make them to give as a gift. This time I used paint chips. I used this as an opportunity to play with my scrap booking materials as well. I tied the coasters together with some ribbon I scored for cheap last year at Target on post-Christmas clearance. I used a Trader Joe's paper grocery bag for wrapping paper, and accented with ink stamps. I love how they turned out. Have a look!


 easy peasy

Thursday, September 18, 2014

the haps

Hey there! It sure has been a while since I last wrote. The time goes by so fast, and the guilt builds walls so high. I think I'm still struggling fiddling with the focus of this blog. So until I find it, I hope you enjoy my shifting interests, babblings, and ramblings.
Here's a quick update on what's been happening in our lives: not much! I spend my days singing and dancing to keep Maki happy; cooking and cleaning to keep Husband happy and eking out a little me-time in between to keep Mama sane.

Happy Fall! Dear Summer has gone with no hope of its lingering around in this part of the country. We had a fun, but overall uneventful summer. It was fun playing and exploring outside with Maki everyday. Each day brought us new adventures and discoveries. While Maki was discovering the elements and bustling world around him, Mama was re-discovering all of the many things that we adults take for granted. {When was the last time a fire engine's horn put a smile on your face?}
We spent a lot of time going to the city parks, in our backyard and going for neighborhood walks. Even the days, when I'd rather just lay around in bed, I forced myself to get up and out of the house for Maki's benefit. It's a constant reminder that my life is no longer mine alone. I have to be cognizant that everyday is an opportunity to color and shape my little guy's world. I'm sure I'll need even more reminding of this as the temperature continues to drop around here.

Maki Updates:
We went to NYC to visit my family in July. Maki is a true blooded New Yorker. Something about that city makes him come alive. He's so at home there, it warms my heart. While in New York, Maki had his first accident and subsequent hospital visit! He was running in the apartment, slipped on a rug and busted his teeth through his lip. He had to get four stitches! We're still a bit shell shocked about it. Every time he runs, I imagine him toppling face first. It doesn't help that he has indeed toppled face first a few times since the incident, scoring him bloody gums and a busted lip. It's so scary. I'm just like, "How am I supposed to keep you alive for eighteen years!?" Everyone else, is just like, "Oh, girl, this is the first of many.

Maki still breastfeeds. He eats some solids, but I'd say his diet is about 70/30 breast milk to solids. I'm really proud that we've been able to breastfeed this long. Even though at times (mainly in the middle of a sleepless night), I kind of wish we done or on our way to being done. But I can say that I truly enjoy it. I'll probably be sad when it ends, but for now as long as I am able to be blessed to continue breastfeeding, I will. I hope that he weans himself, because I don't even have the energy to take his "bobby" away from him.

We've been potty training. No pressure, just introducing him to the pot, and encouraging him to voice when he has to go. He's coming around, but like I said, we're not pressuring him.

Well that's the latest around here. As Fall begins to settle in for good, I'll be looking for fun indoor activities to keep us busy on days when it's too cold to go outside. Hopefully I'll find some fun things to share with you here.
Post soon.

Monday, May 5, 2014

in search of: jar projects


I've been collecting jars because I can't stomach tossing a perfectly good container into the trash. When I say collecting, I don't mean I'm out there picking through the trash in search of jars- just that I keep every jar that we buy. Between all of the salsa and tahini we buy, my collection is becoming rather large. I wish there were a way I could just take the jars that I have for a refill of their contents instead of buying new jars every time. Oh the good ol' days.

Poor jar...one coat of paint
and zero direction.
 I need to repurpose or find a craft project that could put these jars to use. I've been combing Pinterest, but I haven't been struck with much inspiration there. I just don't know what to do with them all as I personally don't have any use for them all. I need to figure something out soon though because I'm outgrowing my storage box and my husband's tolerance for the pack rat behavior.  


Have any good suggestions or ideas? Share them in the comments. 


Friday, May 2, 2014

photo challenge: week twenty-one

Okay so I'm cheating a bit this week because I really want to stick to my schedule. Today is photo challenge Friday and I've been busy running errands and doing chores all day. Now here I am, trapped underneath sleeping Maki. I dare not get up to go the computer. So I am posting from my phone. And as any new mom can tell you, my phone gallery is pretty much all Maki. 
As the weather has been warming up lately, Maki and I have been venturing outside. He loves outside. This week has been rainy, but Maki didn't let that stop him. We spent some time poking around outside of the house. 
And so for my photo this week I present, Maki. 

Wednesday, April 30, 2014

maki's birth story

I began writing Maki's birth story as a journal entry back in December. I wanted to share it here on my blog to mark my little man turning one year old this past Monday. Happy Birthday Maki!

I've been thinking about Maki's birth story a lot lately. I think I am ready to write the experience. I've been avoiding writing it for so long because I just didn't want to think about it. For me, it was just one undesirable change after another. It's hard to make sense of such negative feelings surrounding what should have been one of the best and happiest days of my life. I feel so guilty to say that it wasn't. It feels like a slight against my son, but it isn't meant to be that. Of course my son is the most perfect love I have ever felt. And I am truly blessed to have him come to me a happy, healthy baby. But his birthday just was not a good day for me. After a seemingly perfect pregnancy, to end-up on an operating table, cut open--ugh... I don't even know how to finish that sentence. It just hurts. 

We went for our weekly appointment with Ali, our midwife Friday April 26th. I was two days overdue according to the April 24th due date that we had been basing my progress on--so 40 weeks 2 days. I felt fine, and didn't really expect any news or progress, as my husband and I held to the idea that the baby would come closer to the due date that lined up with conception, not size. So some time in the first week of May. After taking my blood pressure, Ali informed me that my pressure was concerningly* high and I'd need to go to the lab to have blood drawn and analyzed that same day. We did. Although I was alarmed, I still felt fine and felt like this was just Ali being cautious as her profession often requires of her. But there was a tiny bit of confusion/worry because I felt like Ali was a lot more worried/concerned than she let on. But I wanted to keep positive and besides, the statistics were on my side. I'd eaten healthy and took care of myself during my entire pregnancy. I was seeing a midwife who out of thirty odd homebirths had only had to transport to the hospital four times. Surely I wouldn't be added to that list. Wrong. 

When the labs came back indicative of pre-eclampsia, I was told we needed to pack up and head to the hospital. This was Saturday morning. Ali and Erin, her assistant, came over to break the news to us. That's kind of the point where I turned off. At that point our plan, everything we had been looking forward to, the pre-laboring at home, the homebirth, privacy, intimacy, it was all gone. I turned off--for me uncertainty became reality. Now that we were going to the hospital, anything could happen. When I say, "I turned off," what I mean is I resolved myself to accept what would be necessary, and push the "should have beens" aside. Just don't think about. Of course the rational, logical side of me was still on, but I truly checked out of the experience emotionally. 

When we got the hospital we learned that we were going to induce labor using Cervidil, a cervical suppository that would allow for me to move around and labor freely. However, since we were dealing with my blood pressure being elevated, that really wasn't the case. I spent most of the time laboring in bed. Because, even though standing, moving and changing positions felt better and made labor easier for me, it sent my blood pressure through the roof, so I basically needed to remain lying down. We did three rounds of Cervidil, with very minimal effect. I was contracting, my cervix was effacing, however it was not dilating...pretty much at all. Ali and Erin met us at the hospital and were there for support in a doula capacity. A few hours into labor, I guess it was the middle of the night some time (labor having started at 2:30PM) Ali suggested I try the birthing pool. I had looked forward to laboring in a pool, but in reality, the reality I found myself in, it was a cold, uncomfortable, unpleasant fail! I just wasn't happy, so I wasn't excited about it. I was in pain and tired. And although the water was warm, I was just cold and wanted to curl up in my warm bed underneath the blankets. Not to mention, when I did get out of the tub, after about an hour, my blood pressure was through the roof. Not a good move. 

After getting out of the pool, I labored in bed all through the night. No sleep, no progress. When Doctor B. came the next morning, he suggested breaking my water to perhaps help bring the baby down. I felt like we were just going down the disaster check list. Everything that I did not want to happen was happening to me. It seemed like I was on a sure course to a C-Section. but I still held out hope that the induction would end in a vaginal birth. So we agreed to break my water. Well that didn't "work" either. Our next and last option was to try Pitocin. After  twenty hours of induced labor, exhausted doesn't begin to describe how I felt. I was through! But I still wanted to deliver vaginally, so I agreed to the Pitocin and gave-in to the epidural. I wanted to get some rest and recharge so I would be able to push and deliver when the time came. 

Well after the epidural, I was able to sleep and rest through Pitocin induced contractions. I felt better, but I felt defeated inside. Still, I held out hope for the chance to deliver vaginally. Only every time the doctor came in for a check, there was no progress being made. In the span of twenty-four hours I had dilated only four centimeters, three of which were pretty much stretched by the doctor during his checks. The baby was beginning to get a cone-head from trying to squeeze through too small of an opening--my window of time had pretty much expired. The baby needed to come out. I would be having a C-Section. 

From the time it was decided that I'd have a C-Section to the time I held my little guy in my arms all felt like a matter of ten minutes. It was quick. Done. Over. "Here's your baby." 

Despite all that did and did not happen over the previous twenty-four hours, holding the being that had lived and grew inside of me the past ten months meant everything. It didn't matter how he got to me. I wouldn't hold that against him. What mattered was that I was finally looking into his little face...as he was peeing in mine.


*I make up words all the time. You get the point.

Monday, April 21, 2014

i'm back

It seems I have taken quite the break from blogging, even allowing myself to fall off from the photo challenge. Well I'm back and re-recommitted. :) I was away pursuing the possibility of returning to work. However, long story short: it wasn't my time. In addition to many other factors, I was getting quite nervous and anxious about being separated from my little man. So while I won't be returning to work, I am relieved that I'll continue to stay at home with Maki.

Speaking of Maki, we are one week away from his first birthday! People always say, "oh it goes so fast," but for me it hasn't really. This year felt exactly a year long! And what a lovely year it has been. Maki is walking, saying a few words and babbling a ton. He has four fully emerged teeth and four half teeth pushing their way through. We're still breastfeeding, but he does eat some solids. He nibbles off of our plates and his favorite things to eat are yogurt, oranges and veggie sticks. He loves trucks and balls and bath time and books. His favorite book is, Mr. Brown Can Moo, Can You? by Dr, Seuss. He loves all of the silly sounds Mama makes when reading it. And now that the weather is half way decent, he loves spending time outside. He's developing into such a little person, and it's amazing to watch.

Next week, in honor of my little man turning one, I'll share his birth story. I've been working on it for quite a while as some parts have been difficult for me to revisit. However, I am excited to get it finished and share it here with you.

Friday, January 31, 2014

menu musings: gravy train

I don't really like gravy. I mean, I'll eat it if it's already on my meal, but if it's on the side, I opt out. My husband, on the other hand, loves gravy and sauces and condiments. So I tried my hand at a gluten free gravy from scratch. I searched the internet for some recipes, but I quickly became overwhelmed by too much text... yes, my laziness is real.
So, I know that gravy is made with some kind of mix of water and flour, so I decided to wing it. I did search for a simple gravy recipe just to get the proportions of flour and water. It turned out delicious. Here's my recipe for gluten free gravy.

Ingredients:
onion (about 2 sliced rounds)
1/2 green pepper
mushrooms ( I used 4 baby bellas)
2-3 tbsp olive oil
1 cup water
1/4 cup gluten free flour (I used millet flour)
1/4 cup chicken (or whatever meat you're cooking) drippings
sea salt to taste

Make it:
1- chop the onion green pepper and mushroom
2- in saucepan heat oil over medium fire
2- add chopped veggies to heated oil and toss around for about 5 minutes
3- add water
4- fold in flour
5- stir in drippings
6- stir, stir, stir. once mixture begins to thicken (should happen very fast) turn fire to low and cover for about 6-7 minutes. keep a watch on it for desired consistency.
7- salt to taste
8- the end.

Enjoy!

photo challenge: week fourteen


Friday, January 24, 2014

catching up with the joneses

We're not the Joneses but you get the point. 
Okay okay, I know I haven't posted in quite some time. It's not for lack of content, I actually have possible blog topics run through my mind quite often throughout the day. The problem has been that I kinda don't have time. This may sound weird considering I'm a stay at home mom, but it's true. My "me time" is made up of stolen moments in between chores, Maki's naps and Daddy time. {break for cranky, teething Maki}
But here's a quick update of what's been the haps' 'round here:
Maki is nearing 9 months! So awesome. He's a super crawler. He pulls himself up to standing. He's beginning to let go just long enough to realize he's standing on his own and panic. He has 2 and 2 halves teeth {bottom two are completely in, top two are still coming in}. He's super active. He loves his activity table. We jokingly call it his deejay table because he loves the music mode and when he's on it he looks like a deejay playing a set. He's still breastfed {not technically exclusively, but pretty much exclusively}. We are still trying to introduce solids. He's not too interested in food. He just wants to be included in what we're having at the dinner table. He likes apples, oranges, veggie chips {and chicken bones}. He doesn't really like purees. He did them maybe for a week or so, and then was over it. So the Baby Bullet is basically Mommy's smoothie maker. We're still gluten, egg and dairy free. We are thinking of making our way to the meat free side as well, but for now we're just limiting our meat to no more than 4 times a week.
I think this about catches us up, I am committing myself to do a written post at least once a week. So be back soon!

photo challenge: week thirteen

I'm playing with the watermark placement. I like this one.
Thank God for the photo challenge, I've completely neglected my writing posts. The guilt is becoming overwhelming. New post coming soon. 


Sunday, January 19, 2014

photo challenge: week twelve

Oops, pretty late on this one. Time just got away from me. I like the intent of this photo, but not necessarily the execution. This is a photo I would probably play around with in Photoshop to get just right. There's dopeness here that just needs to be brought out.